Deploying SMART Notebook
Deploying SMART Notebook
Management Utilities can be used to perform a silent installation of SMART Notebook.
Requirements: Installation files for SMART Notebook and SMART Install Manager should be obtained from SMART Technologies. This procedure has been tested for SMART Notebook 10. Windows target systems must have the SyAM System Client installed and reporting to SyAM System Area Manager. Target systems must be discovered by Management Utility.
On your workstation, install SMART Install Manager, which will be used to create the .mst file that contains your product key and any other customizations you choose. Unzip the SMART Notebook software archive file.
Run SMART Install Manager. From the SMART Notebook software folder, drag and drop the file SMART Notebook.msi into SMART Install Manager. Enter your product key, and review any installation options you wish to customize. When finished, choose Publish from the File menu to create the .mst file.
Create a batch file to perform the installation using msiexec:
c:
cd \
msiexec /i "\\192.168.100.156\apps\SMART Notebook.msi" TRANSFORMS="smart.mst" /q
exit
Modify the example batch file to specify the location of your default application directory and the name you gave the .mst file. Place the batch file, the .msi file, and the .mst file in the default application directory defined in the Administration Settings of Management Utility, where the file depsvc.exe is also present.
In the Management Utility, create a Third Party template to install SMART Notebook software. Enter a template name. Select the target platform and authentication template. Enter the path to the network share (this will be filled in already if the default path has been entered in Administration Settings) then click the Find Files button and choose the batch file (e.g. smartnotebook.bat) from the drop down menu.
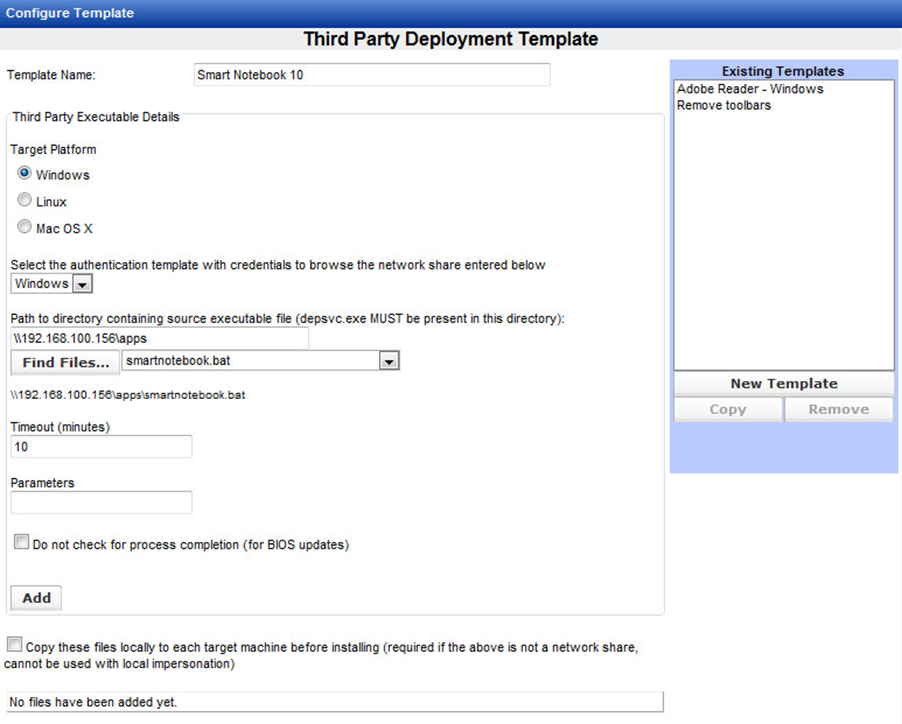
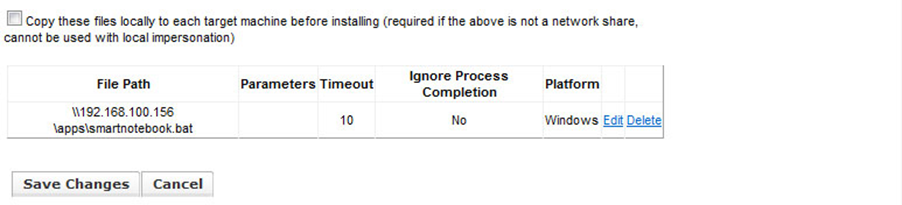
Click the Add button, save changes to the template, and click OK to confirm.
Now you can test deployment to a single system. Select a system in the Groups area. Click the system row, then right-click to display the context menu. From the menu, choose Deploy Third Party Software.
In the New Task box, choose the Windows authentication template and the SMART Notebook application deployment template. Click OK.
On the Add/Edit a Job page, click the Run Job button, then click OK to confirm. The installation will begin shortly.
After the job is finished, you may review the status by finding the job in the Status area and clicking the View Details link.
Once you have deployed successfully on a single machine, you can use the Groups context menu options to deploy the application to multiple client machines.